Customising Windows Terminal
Windows Terminal is a terminal emulator developed by Microsoft that was released in 2019 and has become pretty popular in that short time.
It’s a tab-based program that allows you to open various Shells so out of the box it’s pretty mundane.
This article looks at customising the Terminal to make it more functional and aesthetic. I customise it to how I like it in this article but use the same techniques to make it how you like.
First, you need to have Windows Terminal installed. I you have Windows 11 it might already be installed by default.
If not it’s available on the Microsoft store, or on the GitHub repo.
I’m writing this with PowerShell 7 installed and using Terminal version 1.17.
Customisation
Go into the Settings Menu – > Appearance. Toggle ‘Use Acrylic material in tab row’.

This will take the title bar from looking like this

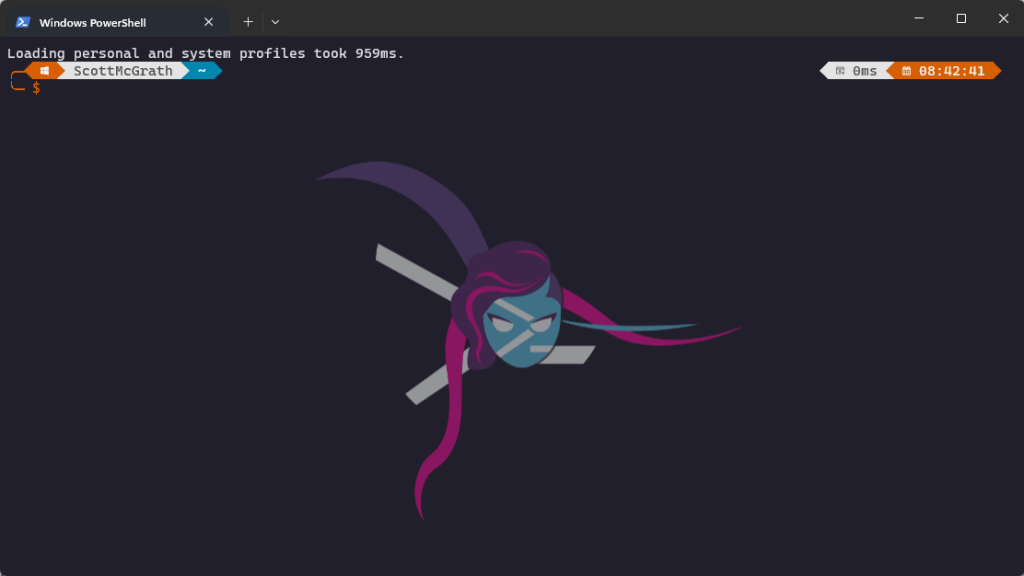
To a transparent look like this. It’s not huge but I like it.

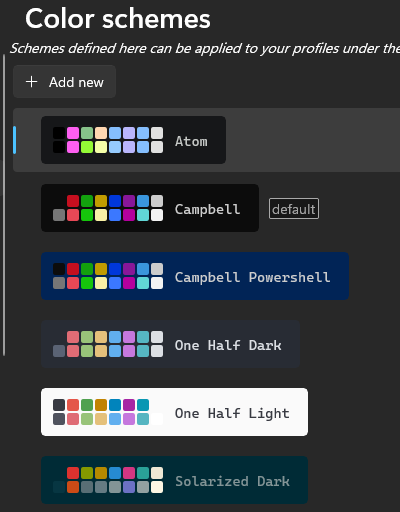
If you go into Settings Color Schemes you can play around with the colours.
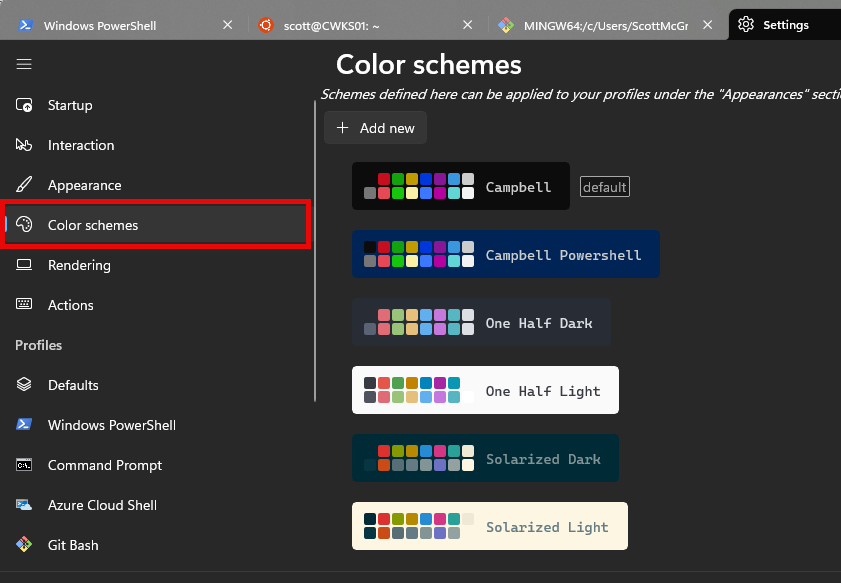
You can also go to https://windowsterminalthemes.dev/ to browse many more.
I’ll install the Atom theme to demonstrate how to do this.
Go to the site and keep hitting next till you get the theme you want (you can also click on the name to get the list).
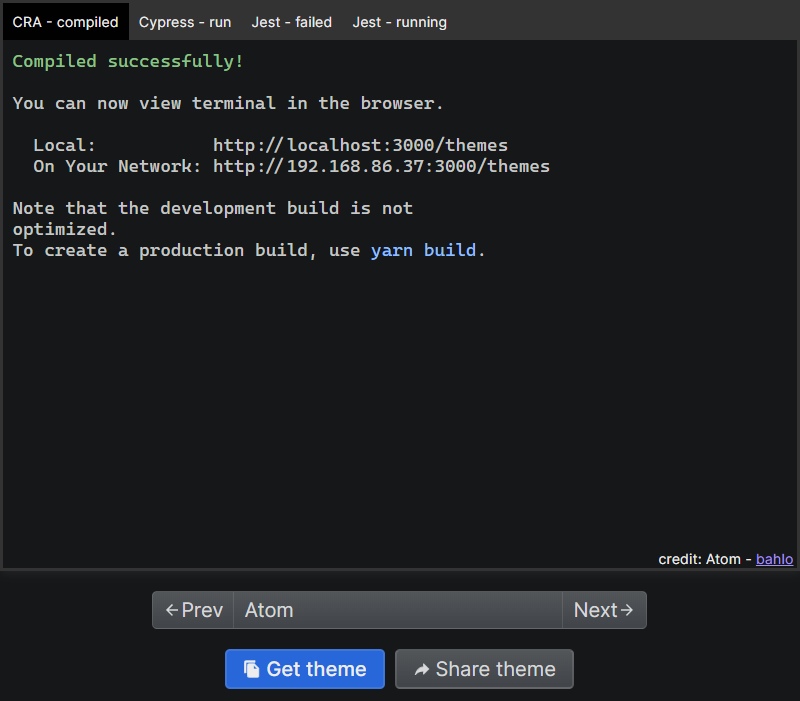
Click on Get Theme. This will copy a block of JSON code to your clipboard.
Go to Terminal > Settings > Open JSON File (Bottom of the menu). Your chosen editor will open the settings file.
Search for schemes
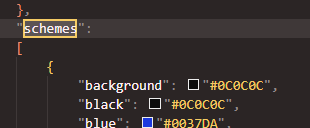
Look for the closing square bracket, and then the curly bracket before that. Add a comma and paste in your new scheme.
In the interface, you’ll see the new theme added to your list. Atom is at the top because it’s displayed in Alphabetical order so yours may not be at the top
Next, we’ll add Nerd Fonts. Go to https://www.nerdfonts.com/font-downloads
Choose the one you like. I like the CaskaydiaCove Nerd Font. Install the font.
You need to close and reopen Terminal after installing fonts to reset the icon cache.
Then go into Settings > Defaults > Appearance
Choose the colour scheme and font you just installed and hit save. Note in here you can add a background if you want.
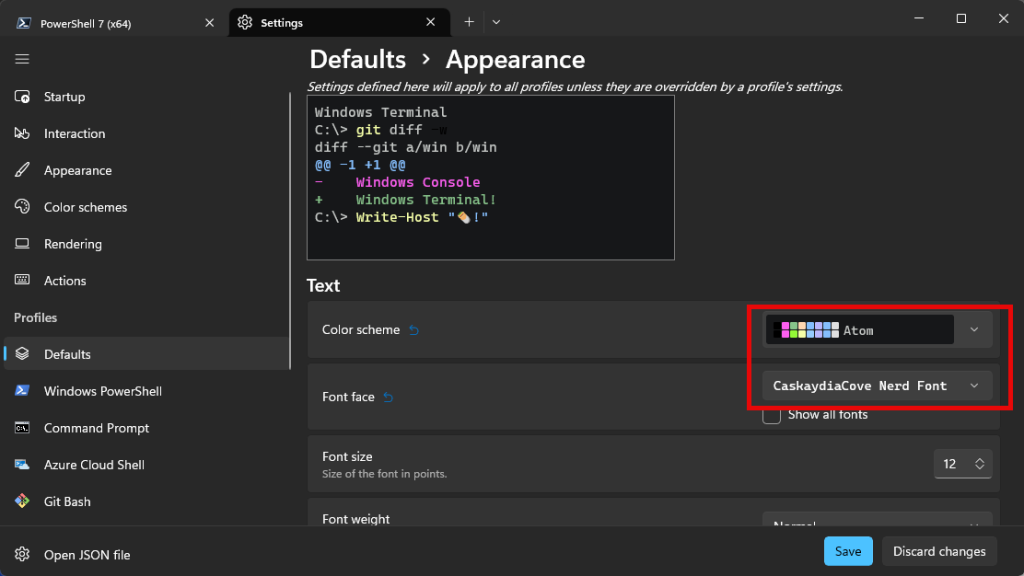
These changes take effect immediately
Now let’s install Oh My Posh. Go to https://ohmyposh.dev/
Click on Get Started and you’ll be taken to the documentation page. On the left are Installations for all OSs. Go to Windows.
You’ll see the Windows has a few options. I prefer Winget.
winget install JanDeDobbeleer.OhMyPosh -s wingetThat should download Oh My Posh. Now close and restart Terminal.
The Oh My Posh documentation gives the following command to install the default theme.
oh-my-posh init pwsh --config "$env:POSH_THEMES_PATH\jandedobbeleer.omp.json"Try that and hit enter. This will produce another command. Copy it and paste and hit enter again.
Use this command and it will scroll through all the themes installed on your system.
Get-PoshThemesI like quick-term. If you ctrl-click on the name it will open the JSON in your chosen code editor. Where you can change it if you want.
The new theme is now active in the current window.

Note the command to set this was
oh-my-posh init pwsh --config "$env:POSH_THEMES_PATH\quick-term.omp.json" | Invoke-ExpressionNow if you restart the PowerShell session you’ll get the default terminal back again. If you want to load this prompt by default then just add this command to you $PROFILE script and it will.
Note if you want to change the theme in the future you’ll need to repeat this step.
Try closing and reopening Terminal now. You’ll see the default prompt is loaded.
Open your $PROFILE in your editor of choice
If you receive a message saying you the profile file referenced in $PROFILE can’t be found, say you’re on a new install just create it with.
New-Item -Path $profile -Type File -ForceAdd the command above. Save and Exit.
Then type the following to reload your profile (or restart Terminal)
. $PROFILEAs an added bonus I like to change the background. For PowerShell, I found one I like on Reddit
https://www.reddit.com/r/PowerShell/comments/eiyiwc/made_a_pscore_wallpaper/
To change This go into Settings, then to Profiles and choose the Profile you want. I want to set a separate background for each profile so you need to do each profile individually.
So for this, I chose Windows PowerShell, then selected the Appearance section, go into the Background image and Browse for the image. Below that is the Background Image Opacity setting. I set that to 50% so have a play around with that. Then you get the following.